Difference between revisions of "Access Your Course Instructor Tools"
| Line 1: | Line 1: | ||
# Click Administration in the tabs along the top of the screen. | # Click Administration in the tabs along the top of the screen. | ||
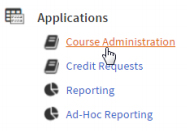
| − | # In the Applications menu, click Course Administration.<br />[[ | + | # In the Applications menu, click Course Administration.<br />[[Image:Toolsins.jpg|none|frame]] |
# In the Search Learning Opportunities screen: | # In the Search Learning Opportunities screen: | ||
#* Enter search criteria to locate the desired course, then click Search.<br />-OR-<br /> | #* Enter search criteria to locate the desired course, then click Search.<br />-OR-<br /> | ||
Revision as of 18:36, 7 June 2018
- Click Administration in the tabs along the top of the screen.
- In the Applications menu, click Course Administration.
- In the Search Learning Opportunities screen:
- Enter search criteria to locate the desired course, then click Search.
-OR- - Click List All. This will display all courses for which you have been identified as a course instructor. If you are an Office Administrator, the list displays all courses within your office.
- Enter search criteria to locate the desired course, then click Search.
- Click the title of the course you want to manage.
- Scroll to Sections at the bottom of this page.
- Click the arrow to access the section drop-down menu and select View Roster.
- Course information will appear at the top of the page. In the middle of the page, a set of menu buttons will display. Use these buttons to access section roster functions.
